Introduction
There’s something magical about transforming simple materials into functional art—tiny treasures that fit in your palm yet carry endless personality. DIY silicone keychains let you do just that, blending creativity with practicality in a craft that’s as durable as it is customizable. Whether you’re a seasoned crafter or a curious beginner, this guide will walk you through every step, from selecting the right silicone pigments to mastering intricate designs. Get ready to turn liquid silicone into wearable masterpieces, perfect for gifting, selling, or simply expressing your style—one vibrant, hand-poured keychain at a time.
1. Essential Tools & Materials for DIY Silicone Keychains

Creating your own DIY silicone keychains is an exciting and rewarding craft that allows you to personalize accessories for yourself, friends, or even as unique gifts. Whether you’re a beginner or an experienced crafter, having the right tools and materials is crucial for achieving professional-looking results. This guide will walk you through everything you need to get started, from basic supplies to optional enhancements that can elevate your designs.
Basic Materials for Silicone Keychains
1. Silicone Mold Making Kit
The foundation of any DIY silicone keychain project is the silicone itself. You’ll need a high-quality silicone mold-making kit, typically available in two-part liquid silicone rubber (LSR) or condensation-cure silicone.
- Two-Part Silicone (A & B Components): This type is ideal for detailed molds because it cures quickly and captures fine textures. Popular options include Platinum-cure silicone (food-safe and highly durable) and Tin-cure silicone (budget-friendly but slightly less flexible).
- Silicone Pigments or Dyes: To add vibrant colors, opt for silicone-specific pigments. Avoid water-based dyes, as they can interfere with the curing process.
### 2. Keychain Hardware
No keychain is complete without the functional components! Here’s what you’ll need:
- Keyring Loops: Stainless steel or nickel-plated rings are durable and rust-resistant.
- Jump Rings: Small metal rings to attach charms or additional decorations.
- Lobster Clasps or Split Rings: For a secure closure.
### 3. Mold Release Spray (Optional but Helpful)
If you’re using intricate molds, a mold release spray prevents sticking and ensures a smooth demolding process.
4. Mixing Tools
Properly blending silicone is essential for a bubble-free finish.
- Plastic or Silicone Mixing Cups: Reusable and easy to clean.
- Stirring Sticks or Popsicle Sticks: For thorough mixing.
- Digital Scale: Ensures precise ratios when combining silicone parts.
### 5. Molds (Custom or Pre-Made)
You can either purchase pre-made silicone molds or create your own using 3D-printed masters or sculpted clay originals.
- Pre-Made Silicone Molds: Great for beginners, available in shapes like animals, letters, or geometric designs.
- Custom Molds: If you want a truly unique DIY silicone keychain, sculpt your design in clay, then cast a reusable silicone mold from it.
## Advanced & Decorative Add-Ons
Once you’ve mastered the basics, consider these extras to enhance your keychains:
1. Glitters & Inclusions
- Silicone-Safe Glitter: Adds sparkle without affecting curing.
- Dried Flowers or Confetti: For a whimsical, translucent effect.
### 2. UV Resin (For a Glossy Finish)
A thin layer of UV resin on top of cured silicone can give a glossy, professional look.
3. Embeds & Charms
- Small Metal Charms: Embedded into the silicone before curing for added detail.
- Glow-in-the-Dark Powder: Creates eye-catching effects for nighttime visibility.
### 4. Engraving or Stamping Tools
Personalize your keychains further by engraving initials or patterns onto the silicone after curing.
Safety & Workspace Setup
Working with silicone requires a few precautions:
- Ventilation: Some silicones emit fumes; work in a well-ventilated area.
- Gloves & Apron: Prevents skin irritation from uncured silicone.
- Silicone Mat or Parchment Paper: Protects surfaces from spills.
## Where to Source Materials
Most supplies can be found at:
- Craft Stores (Michaels, Hobby Lobby)
- Online Marketplaces (Amazon, Etsy, AliExpress)
- Specialized Silicone Suppliers (Smooth-On, Polytek)
## Final Thoughts
With these essential tools and materials, you’re ready to dive into the world of DIY silicone keychains. Experiment with colors, textures, and embellishments to create one-of-a-kind designs that reflect your personality. The possibilities are endless—whether you’re crafting minimalist geometric shapes or intricate layered pieces, the right supplies will make all the difference.
Now that you’ve gathered everything you need, let’s move on to the next step: designing and pouring your silicone keychains!
2. Step-by-Step Silicone Keychain Creation
Creating your own DIY silicone keychains is a fun and rewarding craft that allows you to express your creativity while making practical, personalized accessories. Whether you’re a beginner or an experienced crafter, this step-by-step guide will walk you through the entire process, from gathering materials to finishing your unique keychain.
Materials You’ll Need
Before diving into the creation process, gather the following supplies:
- Silicone mold-making kit (including silicone base and catalyst)
- Keychain hardware (metal loops, jump rings, or lobster clasps)
- Mixing cups and stirring sticks
- Mold release spray (optional, for easier demolding)
- Pigments or dyes (if you want colored keychains)
- Glitter, sequins, or small charms (for added flair)
- A mold of your choice (silicone, 3D-printed, or handmade)
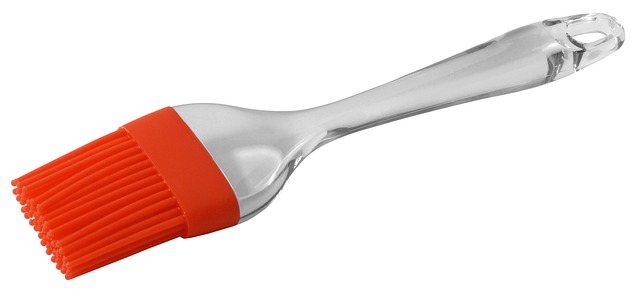
- A toothpick or small brush (for removing air bubbles)
## Step 1: Design Your Keychain
The first step in making DIY silicone keychains is deciding on a design. Consider shapes that reflect your personality—geometric patterns, animals, initials, or even miniature food items. If you’re using a pre-made mold, ensure it’s flexible and durable enough for silicone casting.
For a truly custom piece, you can carve your design into clay and create a silicone mold from it. Alternatively, 3D-printed molds offer precision and intricate detailing.
Step 2: Prepare the Silicone Mixture
Once your mold is ready, it’s time to mix the silicone. Follow these steps:
1. Measure the Silicone Base – Pour the required amount of silicone base into a mixing cup. The ratio of base to catalyst varies by brand, so check the instructions.
2. Add the Catalyst – Slowly incorporate the hardening agent and stir thoroughly for 2-3 minutes to avoid uneven curing.
3. Customize with Color or Embellishments – If you want a colored keychain, add a few drops of silicone dye. For a sparkling effect, mix in fine glitter.
Pro Tip: Work quickly, as silicone begins to cure within minutes!
Step 3: Pour the Silicone into the Mold
Carefully pour the mixture into your mold, filling it completely. To prevent air bubbles:
- Tap the Mold Gently – Lightly shake or tap the mold on a flat surface to release trapped air.
- Use a Toothpick – Swirl a toothpick around edges to pop any remaining bubbles.
If embedding charms or small objects, place them into the silicone before it sets.
Step 4: Let It Cure
Silicone typically takes 4-6 hours to fully cure, though some fast-setting varieties harden in as little as 30 minutes. Keep the mold in a dust-free area while drying.
Tip: For a glossy finish, lightly spritz the surface with mold release spray before pouring.
Step 5: Demold Your Keychain
Once fully cured, gently flex the mold to release your keychain. If it sticks, carefully use a blunt tool to ease it out without damaging the edges.
Step 6: Attach the Keyring
Using a small hole punch or awl, create an opening at the top of your keychain (if not pre-molded). Insert a metal loop or jump ring, then attach a keyring or clasp.
Step 7: Finishing Touches
For extra durability, consider:
- Sealing with a Clear Coat (optional for added shine)
- Engraving or Painting details with acrylic markers
## Creative Variations to Try
Once you’ve mastered the basics, experiment with:
- Layered Silicone – Pour different colors in stages for an ombre effect.
- Glow-in-the-Dark Keychains – Use phosphorescent pigments for a fun nighttime accessory.
- Scented Keychains – Add a drop of fragrance oil to the silicone mix.
## Final Thoughts
Making DIY silicone keychains is an enjoyable way to craft personalized gifts, promotional items, or stylish accessories. With endless customization options, each creation can be as unique as your imagination allows.
Now that you’ve learned the process, why not try different shapes, textures, and colors? The possibilities are limitless—happy crafting!
3. Advanced Design Techniques
Once you’ve mastered the basics of creating DIY silicone keychains, it’s time to elevate your craft with advanced design techniques. These methods will help you transform simple keychains into personalized, intricate works of art. Whether you’re experimenting with textures, layering colors, or embedding unique elements, these creative approaches will inspire you to push the boundaries of your designs.
1. Layering and Swirling Colors
One of the most visually striking techniques in silicone keychain crafting is layering and swirling multiple colors. Unlike single-color pours, this method creates mesmerizing marbled or gradient effects that make each piece unique.
How to Achieve the Effect:
- Prepare Multiple Colors: Mix your silicone base with different pigments, ensuring each batch is well-blended.
- Layering: Pour one color into the mold, let it partially set, then add a second color. The slight curing of the first layer prevents full blending, creating defined layers.
- Swirling: For a more organic look, pour two or more colors simultaneously and use a toothpick or skewer to gently swirl them before the silicone sets.
Pro Tip: For a translucent effect, use a clear silicone base with just a hint of pigment. This works beautifully for ocean-inspired designs or galaxy-themed keychains.
2. Embedding Objects for Customization
Why stop at color when you can embed small objects into your DIY silicone keychains? This technique adds texture, dimension, and personal meaning to your creations.
Popular Embedding Ideas:
- Glitter and Sequins: For a sparkling finish, sprinkle fine glitter between silicone layers.
- Dried Flowers or Leaves: Preserve natural beauty by embedding small botanicals in clear silicone.
- Mini Charms or Beads: Add tiny metal or resin charms for a mixed-media look.
- Photographs or Printed Art: Seal small printed images between layers for a sentimental touch.
Important Note: Ensure embedded objects are lightweight and non-porous to prevent bubbles or separation.
3. Textured and 3D Effects
Texture can take your silicone keychains from flat to fabulous. By manipulating the surface before curing, you can achieve everything from geometric patterns to lifelike imitations.
Techniques to Try:
- Silicone Molding with Textured Sheets: Press a textured sheet (like lace or scales) into the silicone before it sets.
- Hand-Carved Details: Use sculpting tools to etch designs into partially cured silicone.
- 3D Add-Ons: Attach small silicone shapes (hearts, stars, letters) to the surface for a raised effect.
Example: A keychain with a faux “knitted” texture can mimic yarn, making it perfect for craft lovers.
4. Glow-in-the-Dark and Thermochromic Silicone
For keychains that stand out day and night, experiment with specialty silicones.
- Glow-in-the-Dark Pigments: Charge under light, then watch your design illuminate in the dark—ideal for safety accessories or fun novelty items.
- Thermochromic (Color-Changing) Silicone: These pigments react to temperature shifts, creating interactive keychains that change color when touched.
Creative Application: Use glow-in-the-dark silicone for constellation-themed keychains or thermochromic for mood-inspired designs.
5. Two-Part Molds for Complex Shapes
If you’re ready to move beyond basic shapes, two-part molds allow for intricate, multi-sided designs.
Steps to Create a Two-Part Mold:
1. Design Your Master Model: Use clay or 3D printing to create the original shape.
2. Build the Mold Box: Secure the model in a container, leaving space for silicone.
3. Pour the First Half: Once cured, flip and repeat for the second half.
4. Demold and Combine: After both sides set, remove the master and pour silicone into the complete mold.
Best For: Detailed figurines, multi-layered logos, or keychains with engraved text.
6. Metallic and Pearlescent Finishes
For a luxe touch, incorporate metallic powders or pearlescent pigments into your silicone mix. These additives create a shimmering, high-end finish without additional painting.
Application Tips:
- Mix mica powder thoroughly to avoid clumps.
- Pair with translucent silicone for a delicate sheen.
- Use gold or copper tones for elegant, jewelry-like keychains.
## 7. Custom Lettering and Logos
Personalized keychains make fantastic gifts, and with advanced techniques, you can incorporate names, dates, or logos seamlessly.
Methods:
- Silicone Stamps: Press alphabet stamps into uncured silicone.
- Embedded Vinyl Decals: Print designs on vinyl, place them in the mold, and pour silicone over them.
- Hand-Painting with Silicone Dyes: After curing, use silicone-based paints for fine details.
Example: A wedding date embedded in a heart-shaped keychain becomes a cherished keepsake.
Final Thoughts
Advanced design techniques open a world of creative possibilities for DIY silicone keychains. Whether you’re layering colors, embedding keepsakes, or experimenting with glow-in-the-dark effects, each method adds a unique flair to your handmade creations. Don’t be afraid to mix techniques—combine textures with metallic finishes or embed objects in multi-colored swirls for truly one-of-a-kind results.
Now that you’ve explored these innovative approaches, which technique will you try first? Share your experiments and inspire fellow crafters to take their silicone keychains to the next level!

4. Troubleshooting & Pro Tips
Creating DIY silicone keychains is a rewarding craft, but even the most experienced makers encounter challenges along the way. Whether you’re dealing with air bubbles, uneven curing, or design mishaps, this troubleshooting guide will help you refine your process. Plus, we’ll share pro tips to elevate your keychains from simple trinkets to professional-quality accessories.
Common Issues & How to Fix Them
1. Air Bubbles in the Silicone
Air bubbles can ruin the smooth finish of your keychains. Here’s how to prevent and fix them:
- Stir Slowly: Mix your silicone base and catalyst gently to minimize air incorporation.
- Use a Vacuum Chamber (Pro Tip): If you’re serious about bubble-free results, a vacuum chamber sucks out trapped air before pouring.
- Toothpick Trick: After pouring, lightly drag a toothpick over the surface to pop any visible bubbles.
### 2. Silicone Not Curing Properly
If your keychain remains sticky or doesn’t set, check these factors:
- Incorrect Ratios: Always measure the silicone and catalyst precisely—too much or too little can affect curing.
- Cold Environment: Silicone cures best at room temperature. If your workspace is too cold, try placing the mold near a warm (not hot) surface.
- Expired Materials: Old silicone or catalyst may lose effectiveness. Always check expiration dates.
### 3. Difficulty Removing from the Mold
Struggling to demold? Try these solutions:
- Flexible Molds: Silicone molds work best because they bend without breaking.
- Release Spray: A light spritz of mold release spray prevents sticking.
- Freezer Method: If the keychain resists, place the mold in the freezer for 5-10 minutes—the silicone will contract slightly for easier removal.
### 4. Colors Bleeding or Fading
Vibrant hues make DIY silicone keychains pop, but pigments can sometimes misbehave:
- Use Compatible Dyes: Not all colorants work with silicone. Opt for silicone-specific pigments.
- Mix Thoroughly: Inconsistent mixing leads to streaks. Stir until the color is uniform.
- UV Protection: If your keychain will be exposed to sunlight, choose UV-resistant dyes to prevent fading.
## Pro Tips for Next-Level Keychains
1. Layering & Embedded Designs
Take your keychains to the next level by embedding small objects or creating layered effects:
- Glitter & Confetti: Add sparkle by mixing fine glitter into the silicone before pouring.
- Resin Inserts: Embed tiny dried flowers, beads, or even miniature charms for a unique touch.
- Gradient Effects: Pour different colored layers in stages, allowing each to partially cure before adding the next.
### 2. Custom Shapes & Textures
Why stick to basic shapes when you can experiment?
- Hand-Carved Molds: Use polymer clay to sculpt a custom mold, then cast silicone into it.
- Texture Sheets: Press a textured sheet (like lace or scales) onto the surface before curing for intricate patterns.
### 3. Functional Add-Ons
Make your keychains practical as well as pretty:
- Glow-in-the-Dark Pigments: Perfect for finding keys in the dark.
- Scented Silicone: Add a few drops of fragrance oil for a pleasant surprise.
- Multi-Purpose Keychains: Incorporate a bottle opener or small measuring tape for utility.
### 4. Professional Finishing Touches
- Sanding Edges: If your keychain has rough edges, lightly sand them with fine-grit sandpaper.
- Polishing: A dab of silicone lubricant can restore shine after demolding.
- Personalized Tags: Attach a small metal tag with initials or a short message for a custom gift.
## Final Thoughts
Troubleshooting is part of the creative journey, and every challenge is an opportunity to refine your craft. With these solutions and pro tips, your DIY silicone keychains will not only look polished but also reflect your unique style. Don’t be afraid to experiment—whether it’s playing with bold colors, embedding unexpected treasures, or designing functional accessories, the possibilities are endless.
Now that you’re equipped with these insights, grab your silicone and molds, and start creating keychains that stand out!
5. Creative Applications & Trends
Silicone keychains have evolved far beyond their humble beginnings as simple functional accessories. Today, they serve as canvases for creativity, personal expression, and even branding. Whether you’re a DIY enthusiast or a small business owner, the possibilities for DIY silicone keychains are endless. This section explores the latest trends, innovative applications, and inspiring ideas to help you push the boundaries of what these versatile accessories can do.
Personalized Keepsakes & Gifts
One of the most heartwarming trends in DIY silicone keychains is their use as personalized keepsakes. Unlike mass-produced trinkets, handmade silicone keychains can be customized with names, dates, or even tiny handprints—making them perfect for:
- Wedding favors – Engrave initials or wedding dates for a memorable guest gift.
- Baby showers – Create adorable keychains with baby’s name or footprint molds.
- Anniversaries & milestones – Celebrate special moments with custom designs.
For example, a simple heart-shaped silicone keychain with a couple’s initials can become a cherished memento. The tactile, durable nature of silicone ensures these keepsakes last for years.
Branding & Promotional Merchandise
Businesses and content creators are increasingly turning to DIY silicone keychains as affordable yet impactful promotional tools. Their flexibility in design and durability makes them ideal for:
- Corporate giveaways – Branded keychains in company colors with logos.
- Event souvenirs – Custom shapes for concerts, festivals, or conventions.
- Social media merch – Influencers can offer unique, limited-edition designs to fans.
A clever example is a café handing out mini coffee cup-shaped keychains with their logo—functional, eye-catching, and a constant reminder of the brand.
Functional & Multi-Purpose Designs
Why settle for just a keychain when it can serve multiple purposes? The latest trend in DIY silicone keychains is combining aesthetics with utility:
- Bottle openers – Mold a keychain with an integrated opener for practicality.
- Earbud holders – Prevent tangled wires with a wrap-around silicone design.
- Mini flashlights – Embed tiny LED lights for a handy nighttime accessory.
These innovations make keychains not just decorative but highly functional, increasing their appeal.
Eco-Friendly & Sustainable Creations
With growing environmental awareness, many crafters are exploring sustainable DIY silicone keychains by:
- Using biodegradable silicone – A greener alternative to traditional plastics.
- Upcycling materials – Repurposing old silicone molds or scraps.
- Promoting reusable designs – Keychains that double as straw holders or utensil sleeves.
Eco-conscious consumers love accessories that align with their values, making this a smart niche for crafters.
Pop Culture & Themed Keychains
From anime characters to viral memes, pop culture-inspired DIY silicone keychains are a massive hit. Crafters can tap into trends by:
- Creating fandom merch – Silhouettes of popular movie icons or game logos.
- Seasonal designs – Halloween pumpkins, Christmas trees, or Valentine’s hearts.
- Niche aesthetics – Cottagecore, vaporwave, or minimalist abstract shapes.
Limited-edition drops of themed keychains can also drive demand, especially in online marketplaces like Etsy.
Interactive & Glow-in-the-Dark Keychains
Adding an element of surprise or interactivity makes DIY silicone keychains even more engaging:
- Glow-in-the-dark pigments – Perfect for rave accessories or night visibility.
- Color-changing thermochromic silicone – Reacts to temperature shifts.
- Scented keychains – Infuse with light fragrances like vanilla or lavender.
These playful twists turn ordinary keychains into conversation starters.
Collaborative & Community-Driven Projects
The DIY silicone keychains movement isn’t just about individual creativity—it’s also a way to connect with others. Consider:
- Workshops & craft circles – Host keychain-making sessions with friends.
- Charity fundraisers – Sell custom keychains to support causes.
- Artist collaborations – Partner with illustrators for exclusive designs.
Community-driven projects foster creativity while building meaningful connections.
Final Thoughts: Where Will Your Creativity Take You?
The world of DIY silicone keychains is brimming with potential. Whether you’re crafting sentimental gifts, launching a small business, or simply exploring a new hobby, these tiny accessories offer limitless opportunities for innovation. Stay inspired by experimenting with textures, colors, and functionalities—your next creation could be the start of something extraordinary.
So, grab your silicone molds, pigments, and imagination—what will you make next?
FAQs About DIY Silicone Keychains
What are the essential tools needed for making DIY silicone keychains?
To create DIY silicone keychains, you’ll need:
– Silicone mold-making kit (or pre-made molds)
– Two-part silicone rubber (like Ecoflex or Mold Star)
– Pigments or dyes for coloring
– Mixing cups and stir sticks
– Keychain hardware (e.g., metal loops, jump rings)
– Release spray (optional, for easy demolding)
How do I prevent bubbles in my silicone keychains?
Bubbles can ruin the finish of your DIY silicone keychains. To avoid them:
– Mix silicone slowly to minimize air introduction.
– Use a vacuum chamber (for professional results).
– Tap the mold gently to release trapped air.
– Pour silicone in thin layers for intricate designs.
Can I use food-grade silicone for DIY keychains?
Yes! Food-grade silicone is safe, flexible, and durable—perfect for DIY silicone keychains. However, ensure it’s compatible with pigments and has a suitable curing time for crafting.
How long does silicone take to cure for keychains?
Curing time varies by product:
– Fast-cure silicones set in 20-30 minutes.
– Standard silicones take 4-6 hours.
– Thick pours may require 24 hours. Always check the manufacturer’s instructions.
What are some trending designs for DIY silicone keychains?
Popular trends include:
– Glow-in-the-dark or UV-reactive keychains
– Marble-effect silicone with swirling colors
– Embedded items (dried flowers, glitter, or small charms)
– Custom-shaped molds (animals, logos, or geometric patterns)
How can I make my silicone keychains more durable?
To enhance durability:
– Use high-quality silicone with strong tear resistance.
– Reinforce thin parts with thicker silicone layers.
– Avoid over-stretching the keychain loop area when attaching hardware.
Where can I sell my handmade silicone keychains?
DIY silicone keychains are popular on:
– Etsy, Amazon Handmade, or eBay
– Local craft fairs and markets
– Social media shops (Instagram, Facebook Marketplace)
– Custom orders for businesses or events
Can I reuse silicone molds for multiple keychains?
Absolutely! Silicone molds are reusable if handled carefully. Clean them with mild soap and avoid sharp tools that could damage details. Store them flat to prevent warping.