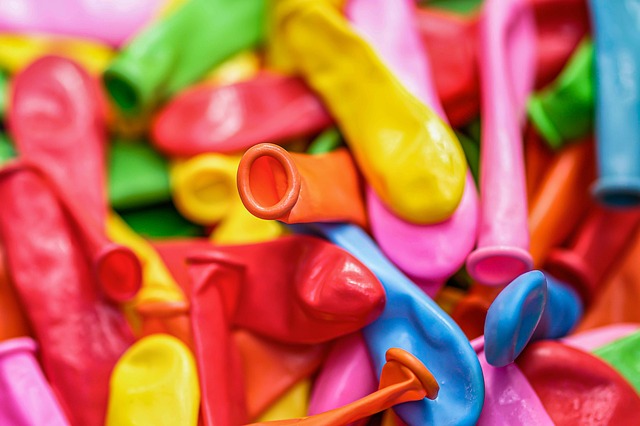
Welcome to the wonderful world of personalized crafting, where you can create stunning, professional-looking accessories right at your kitchen table. The art of making DIY silicone keychains is an accessible and immensely satisfying craft, perfect for beginners and seasoned makers alike. This guide will show you how to craft beautiful leather-look keychains that are durable, customizable, and make for perfect handmade gifts. Let’s dive in and transform simple materials into your own unique wearable art.
1. What is Two-Part Silicone? A Beginner’s Material Guide
1. What is Two-Part Silicone? A Beginner’s Material Guide
Welcome to the world of two-part silicone—a material that’s as versatile as it is fascinating. If you’ve ever admired the smooth, durable, and beautifully detailed finish of custom-made items like DIY silicone keychains, chances are you were looking at the handiwork of this remarkable substance. But what exactly is two-part silicone, and why has it become such a beloved medium for crafters and makers? In this guide, we’ll unravel the magic behind this material, explore its unique properties, and show you why it’s the perfect starting point for your creative journey.
At its core, two-part silicone is a liquid compound that cures into a flexible, rubber-like solid. As the name suggests, it comes in two separate components—typically labeled Part A and Part B. Part A is usually the base silicone, while Part B is the catalyst or curing agent. When mixed together in the correct ratio, a chemical reaction called curing takes place, transforming the liquid blend into a durable, resilient solid. This process allows you to cast intricate shapes, capture fine details, and produce items that are both functional and aesthetically pleasing.
One of the most appealing aspects of two-part silicone is its adaptability. It’s available in various types, each suited to different applications. For instance, condensation-cure silicone (often known as tin-cure) is affordable and user-friendly, making it ideal for beginners experimenting with DIY silicone keychains. On the other hand, addition-cure silicone (platinum-cure) offers superior detail reproduction and minimal shrinkage, perfect for projects requiring precision, such as jewelry or decorative accessories. Whether you’re aiming for a leather-like texture or a glossy finish, there’s a formulation to match your vision.
What truly sets two-part silicone apart are its exceptional material properties. Once cured, it becomes tear-resistant, flexible, and capable of withstanding temperatures, moisture, and everyday wear and tear. Imagine crafting a keychain that not only looks professionally made but also lasts for years—silicone makes that possible. Its elasticity allows for easy demolding, meaning you can create complex designs without fear of damaging your masterpiece. Plus, it accepts pigments and dyes beautifully, giving you endless opportunities to play with colors and effects. For example, adding a touch of bronze mica powder can yield a stunning metallic leather appearance, elevating simple keychains into wearable art.
But the real fun begins when you start exploring its creative potential. Two-part silicone invites you to think beyond the ordinary. You can embed glitter, sequins, or even small dried flowers into your casts. You can layer colors for a marbled effect or use silicone-specific molds to achieve textures like faux leather, geometric patterns, or nature-inspired motifs. The only limit is your imagination. For those diving into DIY silicone keychains, this material offers a forgiving yet rewarding experience. Mistakes can often be recycled or reworked, and the learning curve is gentle enough to encourage experimentation.
Practicality is another strong suit. Unlike some crafting materials that require specialized equipment, two-part silicone can be mixed and poured at room temperature using basic tools like measuring cups, stir sticks, and molds. A kitchen scale ensures accurate ratios, and a vacuum chamber (though optional) can help remove bubbles for a flawless finish. For beginners, starting with a small trial batch is a great way to get a feel for the material’s working time and behavior.
In the context of DIY silicone keychains, two-part silicone is nothing short of a game-changer. It allows you to produce custom pieces that reflect your personal style—whether you prefer minimalist designs, vibrant hues, or realistic leather-like finishes. Picture crafting keychains as gifts for friends, adding personalized initials or symbols that hold special meaning. With silicone, you’re not just making an accessory; you’re creating a keepsake.
As you embark on your silicone crafting journey, remember that every expert was once a beginner. Embrace the process, celebrate small victories, and don’t hesitate to push boundaries. Two-part silicone is more than just a material—it’s a gateway to innovation, self-expression, and endless creative delight. So gather your supplies, unleash your ideas, and get ready to bring your unique visions to life, one keychain at a time.
1. From Sketch to Silicone: Creating and Using Design Templates
1. From Sketch to Silicone: Creating and Using Design Templates
Every masterpiece begins with an idea—a spark of creativity waiting to be brought to life. When it comes to crafting your own DIY silicone keychains, that journey starts on paper. Designing a template is not just a preliminary step; it’s the foundation upon which your unique creation will stand. Whether you’re aiming for a minimalist logo, an intricate illustration, or a personalized name tag, translating your vision into a tangible design template ensures precision, consistency, and professional-looking results.
Begin by brainstorming your concept. Consider the theme, purpose, and aesthetic of your keychain. Are you creating a gift for a friend, a promotional item for a small business, or simply expressing your personal style? Sketch your ideas freely, experimenting with shapes, text, and graphics. Don’t worry about perfection at this stage—this is your opportunity to play with possibilities. For instance, if you’re drawn to the rustic charm of leather-look silicone keychains, think about incorporating faux-stitching details, textured backgrounds, or embossed effects into your design. These elements can add depth and character, making your keychain stand out.
Once you’ve settled on a design, it’s time to refine your sketch into a clean, scalable template. If you’re comfortable with digital tools, software like Adobe Illustrator or free alternatives such as Inkscape can help you create vector-based designs that remain crisp at any size. For those who prefer a hands-on approach, simply redraw your sketch on sturdier paper like cardstock, using fine liners to define edges and details. Remember, the template will serve as a guide for cutting and molding, so clarity is key. Define the outer shape—common choices include circles, ovals, rectangles, or custom silhouettes like animals, hearts, or geometric patterns—and mark any cut-outs or interior details.
When your design is finalized, consider how it will translate into silicone. Silicone molding involves pouring liquid silicone into a mold cavity, so your template must account for practical factors like thickness (typically 3-5mm for durability), ease of demolding, and the placement of keychain holes. A small pilot hole, usually 3-4mm in diameter, should be included in your design to accommodate metal rings or connectors later. If your DIY silicone keychains feature multiple colors or layers, you might need separate templates for each component, which will be assembled during the molding process.
With your template ready, the next step is transferring it to your molding material. For silicone casting, you’ll often use materials like two-part silicone rubber (such as tin-cure or platinum-cure silicone) to create a reusable mold. Place your paper or printed design under a transparent sheet or directly onto your mold-making base. Using a mold box—a simple frame made from LEGO bricks, cardboard, or acrylic—secure your template and pour the silicone over it. Once cured, you’ll have a negative mold that captures every detail of your original design. This mold becomes your go-to tool for producing identical keychains, making it ideal for batch creation or experimenting with color variations.
But what if you want to skip making a custom mold? For beginners or those testing designs, pre-made silicone molds are widely available and can be personalized with pigments, glitters, or inclusions. However, creating your own template and mold unlocks limitless creative freedom. Imagine crafting keychains shaped like tiny books for a book club, custom logos for a startup, or even miniature portraits—each one a reflection of your imagination.
As you dive into this process, remember that experimentation is part of the joy. Try combining different textures: mix matte and glossy silicone finishes to mimic leather’s varied surface, or add mica powders for a metallic sheen. Use your templates to create coordinating sets—perhaps a series of nature-inspired keychains for hiking enthusiasts or minimalist designs for everyday elegance. The template isn’t just a blueprint; it’s a launchpad for innovation.
In the world of DIY silicone keychains, your design template is where artistry meets precision. It empowers you to turn fleeting ideas into wearable art, one sketch at a time. So grab your pencils, embrace the process, and watch as your creativity solidifies into something you can hold, share, and cherish.
2. Essential Crafting Tools for DIY Silicone Keychains
2. Essential Crafting Tools for DIY Silicone Keychains
Embarking on the journey of creating your own leather-look silicone keychains is an exciting venture into the world of hands-on creativity. To transform your imaginative designs into tangible, polished accessories, having the right tools at your disposal is not just helpful—it’s essential. Whether you’re a seasoned crafter or a curious beginner, assembling a well-curated toolkit will empower you to experiment, refine, and perfect your DIY silicone keychains with confidence and flair.
Let’s start with the heart of your project: the silicone itself. For achieving that sophisticated leather-like finish, two-part silicone rubber is your go-to material. Opt for a high-quality, pourable silicone that cures at room temperature, as it allows for intricate detailing and a smooth, professional appearance. Brands like Smooth-On or Polytek offer options in various colors and textures, including shades that mimic classic leather tones such as cognac, espresso, or black. Consider silicone with a matte finish additive to enhance the leather effect, giving your keychains an authentic, tactile appeal.
Next, molds are the sculptors of your silicone creations. Silicone molds are ideal because of their flexibility and durability, making demolding a breeze without damaging your delicate designs. You can purchase pre-made molds online or, for a truly personalized touch, create custom molds using mold-making putty or silicone. This opens up endless creative possibilities—think geometric patterns, animal shapes, or even monogrammed initials. If you’re crafting a leather-look keychain, textured molds that imitate stitching, graining, or tooling patterns can elevate the realism of your pieces.
Measuring and mixing tools ensure precision and consistency, which are crucial for successful silicone curing. Use graduated mixing cups for accurate measurements of your silicone parts, and craft sticks or spatulas for thorough blending. Even a slight imbalance in ratios can lead to incomplete curing, so attention to detail here pays off in flawless results. For smaller batches, disposable pipettes can help you measure minute amounts with ease, especially when working with colorants or additives.
Speaking of color, pigments and additives are where your DIY silicone keychains truly come to life. Silicone-specific colorants, available in liquid or paste form, allow you to mix custom hues. To achieve that rich, leather-like depth, layer darker shades with lighter highlights or use mica powders for a subtle, pearlescent effect. For added dimension, consider incorporating silicone-friendly glitter or metallic flakes. Remember, a little goes a long way—start with small amounts and test on a spare mold to perfect your shade before committing to a full batch.
Release agents are unsung heroes in silicone crafting. Applying a thin layer of mold release spray or brush-on agent prevents sticking and ensures your keychains pop out cleanly and intact. This is particularly important for intricate designs or deep molds. Look for non-toxic, silicone-safe options to maintain the integrity of your molds and finished products over multiple uses.
Once your silicone is poured, bubbles can be the enemy of a smooth finish. A pressure pot or vacuum chamber is the professional’s choice for bubble-free results, but for hobbyists, a simple but effective alternative is a heat gun or handheld torch. Gently passing the flame over the surface of poured silicone causes bubbles to rise and pop, leaving you with a sleek, professional look. Always work in a well-ventilated area and follow safety guidelines when using heat tools.
After curing, finishing tools add those final touches that make your DIY silicone keychains stand out. Small, sharp scissors or craft knives help trim any excess flash or imperfections. For attaching keyrings, a hole punch designed for plastics or soft materials ensures clean, consistent holes without tearing. If you’re adding hardware like lobster clasps or split rings, needle-nose pliers are indispensable for secure fastening.
Lastly, don’t overlook your workspace essentials. A level surface protects against uneven pours, and silicone mats or parchment paper make cleanup effortless. Keep isopropyl alcohol and paper towels handy for quick spills or tool cleaning, as silicone can be sticky before it cures.
With these tools in your arsenal, you’re not just equipped to make silicone keychains—you’re prepared to explore a world of creative expression. Imagine crafting keychains that look and feel like genuine leather, each one a unique reflection of your style. Whether you’re making personalized gifts, stylish accessories, or even small-scale products to sell, the right tools transform simple materials into extraordinary creations. So gather your supplies, clear your workspace, and let your imagination lead the way. Your next DIY silicone keychain masterpiece is waiting to be born.
3. Setting Up Your Workspace: Craft Safety and Ventilation Requirements
3. Setting Up Your Workspace: Craft Safety and Ventilation Requirements
Creating your own DIY silicone keychains is an exciting and rewarding craft, but like any creative endeavor, it requires a thoughtful approach to safety and comfort. Your workspace is more than just a table—it’s your creative sanctuary, and setting it up properly ensures not only stunning results but also your well-being. Whether you’re a seasoned crafter or just starting out, paying attention to safety and ventilation will elevate your experience and open the door to endless creative possibilities.
Why Safety and Ventilation Matter
Working with silicone, especially when using two-part compounds or UV resins, involves materials that can emit fumes or require careful handling. While silicone is generally considered safe once cured, the process of mixing, pouring, and curing can release odors or volatile organic compounds (VOCs) that are best avoided in enclosed spaces. Proper ventilation isn’t just a recommendation—it’s your first line of defense in creating a healthy crafting environment. Combine this with mindful safety practices, and you’ll find yourself free to experiment, innovate, and perfect your leather-look silicone keychains without worry.
Choosing the Right Location
Start by selecting a well-ventilated area for your DIY silicone keychain projects. Ideal spots include a garage with the door open, a patio, a craft room with windows, or even a kitchen with a range hood fan. If you’re working indoors, prioritize spaces where air circulates freely. Avoid small, enclosed rooms without windows or airflow, as fumes can accumulate and cause headaches or respiratory irritation over time. For those crafting in apartments or smaller homes, consider using a portable fan directed toward an open window to keep air moving. This simple step transforms any corner into a functional and safe creative hub.
Essential Ventilation Strategies
Good ventilation doesn’t require professional equipment—just a bit of foresight. If you’re working with silicone that has a noticeable odor, such as certain types of molding silicone or pigmented variants, enhance airflow by opening multiple windows to create a cross-breeze. For an extra layer of protection, wear a respirator mask rated for VOCs, especially during extended sessions. These masks are lightweight, comfortable, and readily available at hardware stores, making them a smart addition to your crafting toolkit.
Another effective strategy is to use a small desktop fan positioned to blow fumes away from your breathing zone. Pair this with a box fan in a window to exhaust air outside, and you’ve created a DIY ventilation system that’s both efficient and affordable. Remember, the goal is to keep the air fresh so you can focus on the fun part: designing one-of-a-kind silicone keychains.
Safety Gear: Your Creative Armor
Safety gear might not be the most glamorous part of crafting, but it empowers you to work confidently and comfortably. Start with a pair of nitrile gloves—these protect your skin from uncured silicone, which can sometimes cause mild irritation, and they also keep your projects free from fingerprints and oils. Safety glasses are another must-have, particularly when mixing or pouring silicone, to prevent accidental splashes.
An apron or old clothing is also advisable, as silicone can be tricky to remove once it sets. By suiting up in these basics, you’re not just preventing mishaps; you’re ensuring that your attention remains on creativity rather than cleanup.
Organizing for Efficiency and Safety
A clutter-free workspace isn’t just aesthetically pleasing—it’s safer. Keep your silicone bottles, molds, pigments, and tools neatly arranged to avoid spills or confusion. Use silicone mats or parchment paper to protect surfaces from drips and make cleanup effortless. Designate specific areas for mixing, curing, and storing materials, and always keep food and drinks away from your crafting zone to prevent contamination.
When working with heat tools, such as a heat gun for removing bubbles from silicone, ensure they are placed on a heat-resistant surface and unplugged when not in use. These small organizational habits foster a seamless workflow, allowing you to immerse yourself in the artistry of making leather-look silicone keychains.
Inspiring Your Creative Journey
With your workspace optimized for safety and ventilation, you’re ready to explore the full potential of DIY silicone keychains. Imagine crafting keychains that mimic the texture and elegance of leather, experimenting with metallic pigments, or embedding small charms and glitters into your designs. A well-prepared environment removes barriers, giving you the freedom to innovate—whether you’re creating personalized gifts, building a small business, or simply enjoying a relaxing hobby.
Remember, the effort you put into setting up your space pays dividends in the quality of your creations and your enjoyment of the process. So take a moment to arrange your area, prioritize airflow and safety, and dive into the delightful world of silicone crafting with confidence and inspiration.

4. Understanding the Curing Process and Time for Perfect Results
4. Understanding the Curing Process and Time for Perfect Results
Curing is the transformative stage in creating DIY silicone keychains where your liquid mixture solidifies into a durable, flexible, and beautifully finished piece. It’s the quiet magic that turns your creative efforts into a lasting treasure. While it might seem like a waiting game, understanding the nuances of curing—why it matters, how to optimize it, and what to expect—can elevate your keychain from amateur craft to professional-grade accessory.
At its core, curing is a chemical process. For two-part silicone, it involves a reaction between the base and the catalyst. When mixed, these components begin to link together, forming long polymer chains that give silicone its characteristic strength and elasticity. Temperature, humidity, and the ratio of your mixture all play pivotal roles in this process. A well-measured mix ensures even curing, while environmental factors can either speed it up or slow it down, affecting the final texture and durability.
Patience is your greatest ally here. Rushing the curing process can lead to tacky surfaces, incomplete hardening, or even deformation. Most silicone compounds require 24 to 48 hours to fully cure at room temperature (around 70°F or 21°C). However, this isn’t a one-size-fits-all timeline. Thicker pours, intricate molds, or additives like pigments and glitters might extend the curing time. For example, if you’ve embedded dried flowers or glitter into your leather-look silicone keychains, allow extra time for the material to set uniformly around these elements.
To achieve perfect results, consider these practical insights:
1. Environment Matters: Keep your curing area consistent. Avoid placing molds near windows, vents, or other sources of temperature fluctuation. A stable, dry space prevents issues like surface stickiness or internal bubbles.
2. Test and Learn: Before committing to a large batch, pour a small test keychain. Note how it cures under your specific conditions. This mini-experiment can save you from disappointment and help you refine your technique.
3. Accelerate with Care: While it’s tempting to speed things up, avoid using high heat sources like ovens or hairdryers unless your silicone product explicitly recommends it. Some silicones are heat-curable, but others can become brittle or discolored. If you’re eager to demold, a slightly warmer room (not exceeding 80°F) can shave off a few hours safely.
4. The Demolding Moment: After the recommended time has passed, gently press a corner of the silicone. If it springs back without leaving an indentation, it’s ready. Carefully flex the mold to release your keychain—avoid pulling or twisting, which could distort its shape.
Imagine the satisfaction of unmolding a piece that captures every detail of your leather texture mold, with a supple feel and rich color. That’s the reward of mastering the curing process. And remember, even if a keychain feels slightly soft at first, giving it an extra 12 hours can sometimes make all the difference.
Beyond mere functionality, curing opens creative possibilities. Once you’re confident with the basics, experiment with layered cures for multicolored designs or try embedding small charms during the pour for a personalized touch. The reliability of a well-cured silicone keychain means your creations can withstand daily use, making them not just crafts, but practical pieces of art.
In the world of DIY silicone keychains, curing is where science and creativity meet. Embrace this phase not as a delay, but as an integral part of the journey—one that ensures your handmade keychains are as enduring as they are enchanting.
5. Demolding Mastery: Using Release Agents for a Flawless Finish
5. Demolding Mastery: Using Release Agents for a Flawless Finish
There’s a moment in every DIY silicone keychain project that feels like pure magic: the demolding. It’s the grand reveal, the instant your creation transitions from liquid potential to tangible art. But that magic can quickly turn to frustration if your masterpiece sticks, tears, or loses its crisp detail in the process. That’s where demolding mastery comes in—the art and science of using release agents to ensure a flawless, professional-looking finish every single time.
Think of a release agent as the ultimate wingman for your mold. Its sole job is to create a perfect, invisible barrier between the cured silicone and the mold surface, allowing for a clean, effortless separation. Skipping this step is like baking a beautiful cake without greasing the pan; you might get it out, but it likely won’t be intact or look its best. For DIY silicone keychains, where fine details like faux stitching, textures, and sharp edges define the luxurious leather-like appearance, a flawless release isn’t just recommended—it’s essential.
Choosing Your Elixir: Types of Release Agents
Not all release agents are created equal, and selecting the right one can elevate your project from amateur to artisan. For silicone-based projects, you’ll primarily encounter two types: aerosol sprays and brush-on formulas.
Aerosol sprays, such as those containing PTFE or specialized silicone-safe compounds, offer a wonderfully even, thin coating. They’re fantastic for covering intricate molds quickly, ensuring every nook and cranny—especially important for capturing that authentic leather-grain texture—gets protected. The key is to apply a light, misty coat from a distance of about 6-8 inches. Over-spraying can lead to pooling, which may fill in fine details or leave a residue on your finished keychain.
Brush-on release agents, often water-based, provide more control for smaller or highly detailed molds. Using a soft, clean brush allows you to meticulously work the agent into delicate areas like embossed logos or patterned borders. This method is excellent for ensuring complete coverage without oversaturating the mold. Whichever type you choose, always ensure it’s labeled as compatible with platinum-cure or tin-cure silicone, depending on your material, to avoid any inhibition issues that could prevent your silicone from curing properly.
The Art of Application: Less is More
The most common mistake in using a release agent is the belief that more is better. In reality, a heavy-handed application can be just as problematic as using none at all. A thick layer can create a visible film on your finished piece, dulling the surface and masking those sharp, defined details you worked so hard to create. It can also migrate into the silicone, potentially affecting the cure or leaving a tacky feel.
The ideal technique is to apply a whisper-thin, uniform layer. For sprays, a quick, sweeping pass is all you need. Allow it to dry completely—usually just a minute or two—until the surface appears matte rather than glossy. For brush-ons, apply a small amount and use the brush to spread it into a near-invisible film. If you can see it pooling or beading, you’ve used too much. Gently wipe away any excess with a lint-free cloth. The goal is an undetectable barrier, not a noticeable coating.
Timing and Technique: The Dance of Demolding
Even with a perfect application of release agent, timing your demolding is crucial. Patience is your greatest tool. Allow your silicone keychain to fully cure according to the manufacturer’s instructions. Attempting to demold too early, even with a release agent, can cause stretching, tearing, or distortion.
Once fully cured, start the demolding process gently. Begin by flexing the mold slightly away from the edges of the silicone. If you’re using a rigid mold, carefully work your way around the perimeter, applying even pressure to encourage air to break the seal. For flexible molds, slowly peel them back rather than pulling straight up. You should feel little to no resistance. If you find yourself struggling, stop. Forcing it can damage both the mold and your keychain. Instead, set it aside for another 15-30 minutes; sometimes, a little extra time is all it needs.
Beyond the Basics: Creative Possibilities and Troubleshooting
Mastering release agents doesn’t just prevent mishaps—it unlocks creative confidence. Knowing your pieces will release perfectly allows you to experiment with more complex molds, layered designs, or even embedded elements like dried flowers or metallic foils for your DIY silicone keychains. A flawless release means every delicate inclusion remains perfectly positioned.
If you do encounter a stubborn piece, don’t despair. Gently applying a small amount of isopropyl alcohol around the edge of the mold with a cotton swab can sometimes help break the seal without damaging the silicone. Learn from each experience; if sticking occurs in a particular part of the mold, note that it may need a touch more release agent in that spot next time.
In the end, demolding mastery is what transforms a fun craft into a refined art. It’s the assurance that your vision will emerge exactly as you imagined—crisp, detailed, and ready to impress. By embracing the simple yet powerful step of using a release agent correctly, you ensure that every one of your leather-look silicone keychains is nothing short of flawless.

Frequently Asked Questions (FAQs)
What are the main benefits of choosing a DIY silicone keychain project?
Creating DIY silicone keychains offers numerous benefits. It’s a highly customizable and rewarding craft that allows you to produce unique gifts, promotional items, or personal accessories. You have complete control over the design, colors, and finish (including the popular leather-look). It’s also a cost-effective way to create small batches of durable, high-quality keychains without the need for expensive industrial equipment.
I’m a complete beginner. Is two-part silicone difficult to work with?
Two-part silicone is actually one of the most beginner-friendly molding materials once you understand the basics. The key is precision and patience. By carefully following the manufacturer’s instructions on mixing ratios (typically 1:1 by weight or volume) and ensuring a thorough mix to avoid uncured spots, even newcomers can achieve excellent results. Starting with a small, simple project like a keychain is the perfect way to build confidence.
What are the absolute essential crafting tools I need to get started?
To start crafting DIY silicone keychains, you will need a core set of tools:
High-Quality Two-Part Silicone: Choose a type that cures at room temperature.
Measuring Cups or a Digital Scale: For precise measurement of Parts A and B.
Mixing Cups and Stirring Sticks: Disposable cups and sticks make clean-up easy.
A Keychain Mold: You can purchase a pre-made mold or create your own using a 3D printer or mold-making kit.
Release Agent: Essential for demolding mastery and achieving a flawless finish.
Keychain Hardware: Metal or plastic loops to insert into the silicone before it cures.
Why is workspace ventilation so important for this craft?
Proper ventilation is a critical craft safety requirement. While many modern silicones are labeled as non-toxic and have low volatility, they can still release fumes during the mixing and curing process. Working in a well-ventilated area, such as near an open window or with an exhaust fan, minimizes inhalation of any chemical odors and ensures a safe and comfortable crafting environment.
How long does the silicone curing process usually take?
The curing process time can vary significantly based on the specific silicone product and the thickness of your casting. Most room-temperature vulcanizing (RTV) silicones become touch-dry in 4-6 hours but require a full 24 hours to achieve maximum strength and durability. Always refer to the technical data sheet of your specific silicone for the most accurate curing process and time information.
My keychain is sticking to the mold. How can I prevent this?
Sticking is a common issue easily prevented with demolding mastery. The solution is to consistently use a release agent. Apply a thin, even coat of a compatible mold release spray or brush-on agent to your mold cavity before each pour. This creates a barrier that allows the cured silicone to pop out easily, ensuring a flawless finish on your leather-look silicone keychains every time.
Can I add color or other effects to my silicone keychains?
Absolutely! A major advantage of DIY silicone crafting is customization. You can use:
Silicone Dyes: Specifically formulated liquid pigments that integrate seamlessly.
Silicone Pigments: Concentrated pastes that offer vibrant, opaque colors.
* Mica Powders: For pearlescent, metallic, or glitter effects (use sparingly).
Always ensure any additive is designed for use with platinum-cure silicone to avoid inhibiting the cure.
Where can I find design templates or inspiration for my keychains?
Inspiration is everywhere! For creating design templates, you can:
Use graphic design software like Adobe Illustrator or free alternatives like Inkscape to draw your own vector shapes.
Find simple, bold clipart or SVG files online (ensure they are royalty-free for commercial use if intended).
* Sketch your design by hand, then scan or take a clear photo to use as a digital template. The key is to start with a design that has clear, defined edges for the best results.